Windows 8 is rife with features and behaviors that conspire to perplex even the most experienced PC users. Not all of them are bad, per se, but few of them are immediately intuitive. Making matters worse, the OS was primarily designed for touch control, and as a result, many mouse and keyboard commands feel like tacked-on afterthoughts.
But help is on the way.
We've assembled a list of our favorite Windows 8 shortcuts, tricks, and workarounds. Many focus on making the most of the OS on a traditional desktop PC, so if you're interested in touch gestures, please check out our article that focuses directly on the Windows 8 touch experience. Now let's start our journey of discovery with a look at easy-to-use (though often tough to remember!) Windows 8 hotkey commands.
Employ the hottest hotkeys we know
In these key combinations, hold down the Windows key (normally located between Alt and Ctrl) and another key, as described on this list.
- Press the Windows key to enter the tiled Start screen.
- The Windows key + M minimizes everything that's showing on the desktop.
- The Windows key + E opens Explorer for quick access to folders.
- On the Start screen, press the Windows key + D to instantly get to the desktop.
- The Windows key + Tab opens a list of currently running programs.
- The Windows key + Print Screen takes a screenshot and saves it in a Screenshots folder nested in your Pictures folder.
- To take a screenshot on a Windows 8 tablet, simultaneously press the Windows button and the volume-down button on the tablet chassis.
- The Windows key + Q opens a global search menu. Type what you're looking for and where you would like to look.
- The Windows key + W opens a search in your system settings to quickly locate and change system properties.
- The Windows key + F opens a file and folder search.
- The Windows key + Pause opens the system properties page to show you a quick rundown of your specs.
- The Windows key + "," (that's the comma sign!) makes all current windows transparent, giving you a peek at the desktop as long as you hold down the Windows key.
- The Windows key + "." (the period) snaps a window to the right or left side (toggling each time you press ".").
- The Windows key + R prompts the Run command—useful for quickly launching apps and other routines with a command prompt.
- The Windows key + X opens the Quick Access Menu, exposing system functionality such as the Command Prompt, Disk Management, File Explorer, Run, and more. Alternatively, you can right-click on the bottom right corner of the screen to spawn the Quick Access Menu.
- The Windows key + I opens the settings menu, giving you quick access to the Control Panel, Personalization, and your Power button, among other features.
- The Windows key + O locks orientation on devices with an accelerometer.
Zoom in tight
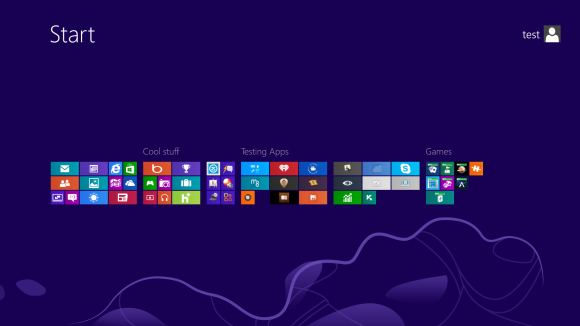
The Start Screen is full of nice, big, chunky tiles that represent all your apps. The tiles are easy to see in small groups, but what if you have hundreds of apps installed? Most will be hidden from view, unless you want to do a lot of scrolling. Enter the new semantic zoom feature. If you’re using a touch display, squeeze the Start screen with two fingers to receive a bird’s eye view of your entire screen contents. And the feature is also available to mouse and keyboard users: Simply hold down the Ctrl button, and use your mouse wheel to zoom in and out.
Categorize your apps
Your Start screen can become a cluttered mess if you collect too many apps and other elements that have been pinned to the screen as tiles, so take advantage of built-in organization tools that let you divide everything into labeled groups.
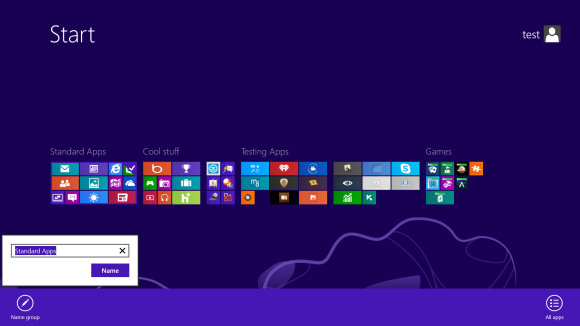
First, drag all the tiles you want to assign to a single group to the far right-hand side of your Start screen in vacant territory; the OS should sequester the tiles together. Once you're satisfied with your assembly, use semantic zoom (described above) to get a bird's eye view of your desktop. Now right-click the group (or simply drag down on it), and select the "Name group" option on the left of the bar that appears below. Type in the name, and enjoy your newly organized Start screen!


0 comments:
Post a Comment
very nice